OK, since you twisted my arm, I'll show you what I did with all those treasures I scooped up!
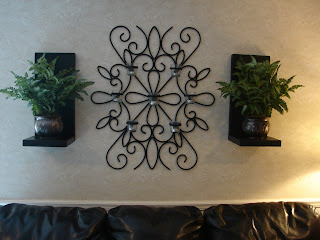
First, here are the shelves along with the bronze pot which I stuffed some pretty green "plants" in. I don't know why it looks like my wall is bowed out--it's really a flat wall! I promise:)
 Here's a close-up--I just love how they turned out!

Here are the bird prints. I had first thought of a different place for them, but decided that I really loved them with my *welcome* sign.
 This is one of the little "plants" I potted. The container once held a poured candle. I thought it was too pretty to toss after the candle burned down, so I've been hanging onto it. I love the way it looks!
 And, lastly, this is one more small "plant" in yet another saved pot from a long-ago arrangement. I think I got it sometime around the time of my daughter's birth (5 years ago!). I guess I'm a sort of pack rat:)
 It's fun adding new decor to the house every so often, especially when it doesn't cost much!
First, here are the shelves along with the bronze pot which I stuffed some pretty green "plants" in. I don't know why it looks like my wall is bowed out--it's really a flat wall! I promise:)
 Here's a close-up--I just love how they turned out!
Here are the bird prints. I had first thought of a different place for them, but decided that I really loved them with my *welcome* sign.
 This is one of the little "plants" I potted. The container once held a poured candle. I thought it was too pretty to toss after the candle burned down, so I've been hanging onto it. I love the way it looks!
 And, lastly, this is one more small "plant" in yet another saved pot from a long-ago arrangement. I think I got it sometime around the time of my daughter's birth (5 years ago!). I guess I'm a sort of pack rat:)
 It's fun adding new decor to the house every so often, especially when it doesn't cost much!
Comments
Reese
Heather
~Kelli