{Mr. B thinking of his *birthday wish*}
Yesterday was Mr. B's 6th birthday and it was a lovely day, spent as a family celebrating simply. For his birthday cake Vince and I decided on a Lego cake and Vince came up with his own design while I baked it.
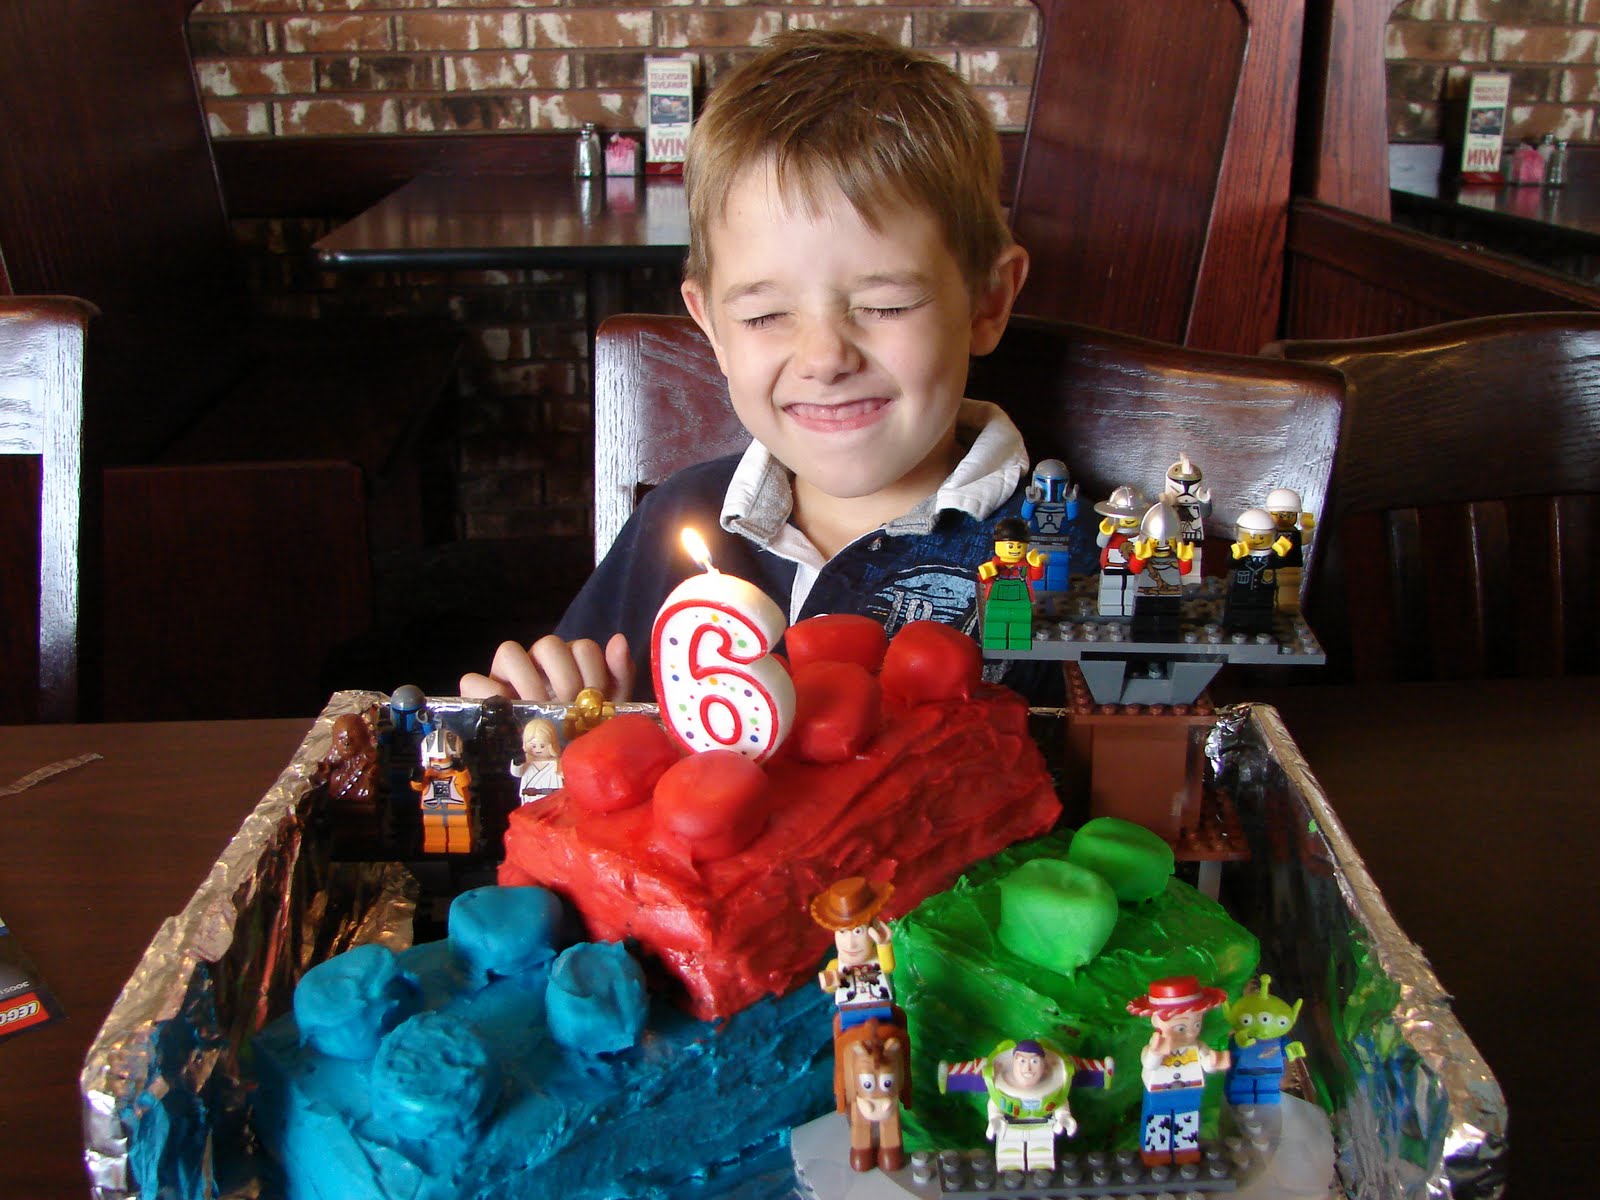
 I decided on a basic yellow cake recipe from the Martha Stewart Baking Handbook (that really is an amazing baking cookbook, btw). Only instead of baking it in the pans suggested, I divided the batter in thirds (ahem....roughly) and baked it in a small rectangular biscuit-type pan. Then we cut each layer into three sections, for three small rectangular layer cakes.
 I whipped up a double batch of my fave frosting, vanilla buttercream, and put it between the layers. Then we dyed the remaining frosting red, blue and green and frosted one cake in each color.
  For the Lego connector dots (or whatever those things on top of the blocks are called) we cut large marshmallows in half and frosted them in the colors to match the cakes. They were just the right size!
 Vince stacked the *Legos* and then gathered up as many of Mr. B's Lego figures as he could and arranged them on platforms around the cakes (with their arms raised in birthday celebration, of course!).

 Mr. B couldn't have been more excited~he loved it! And we all loved eating it, too! SO yummy!
 So there you have it, my first humble attempt at creating a Lego cake. It was definitely worth the work:)