
End of the Week Wrap-Up {Week 4}


Where in the world are these weeks going?!  Somebody tell me, please!!  They are flying by way too quickly!  

The highlight of our week was celebrating International Homeschool Spirit Week with our local homeschool group.  So much fun!  
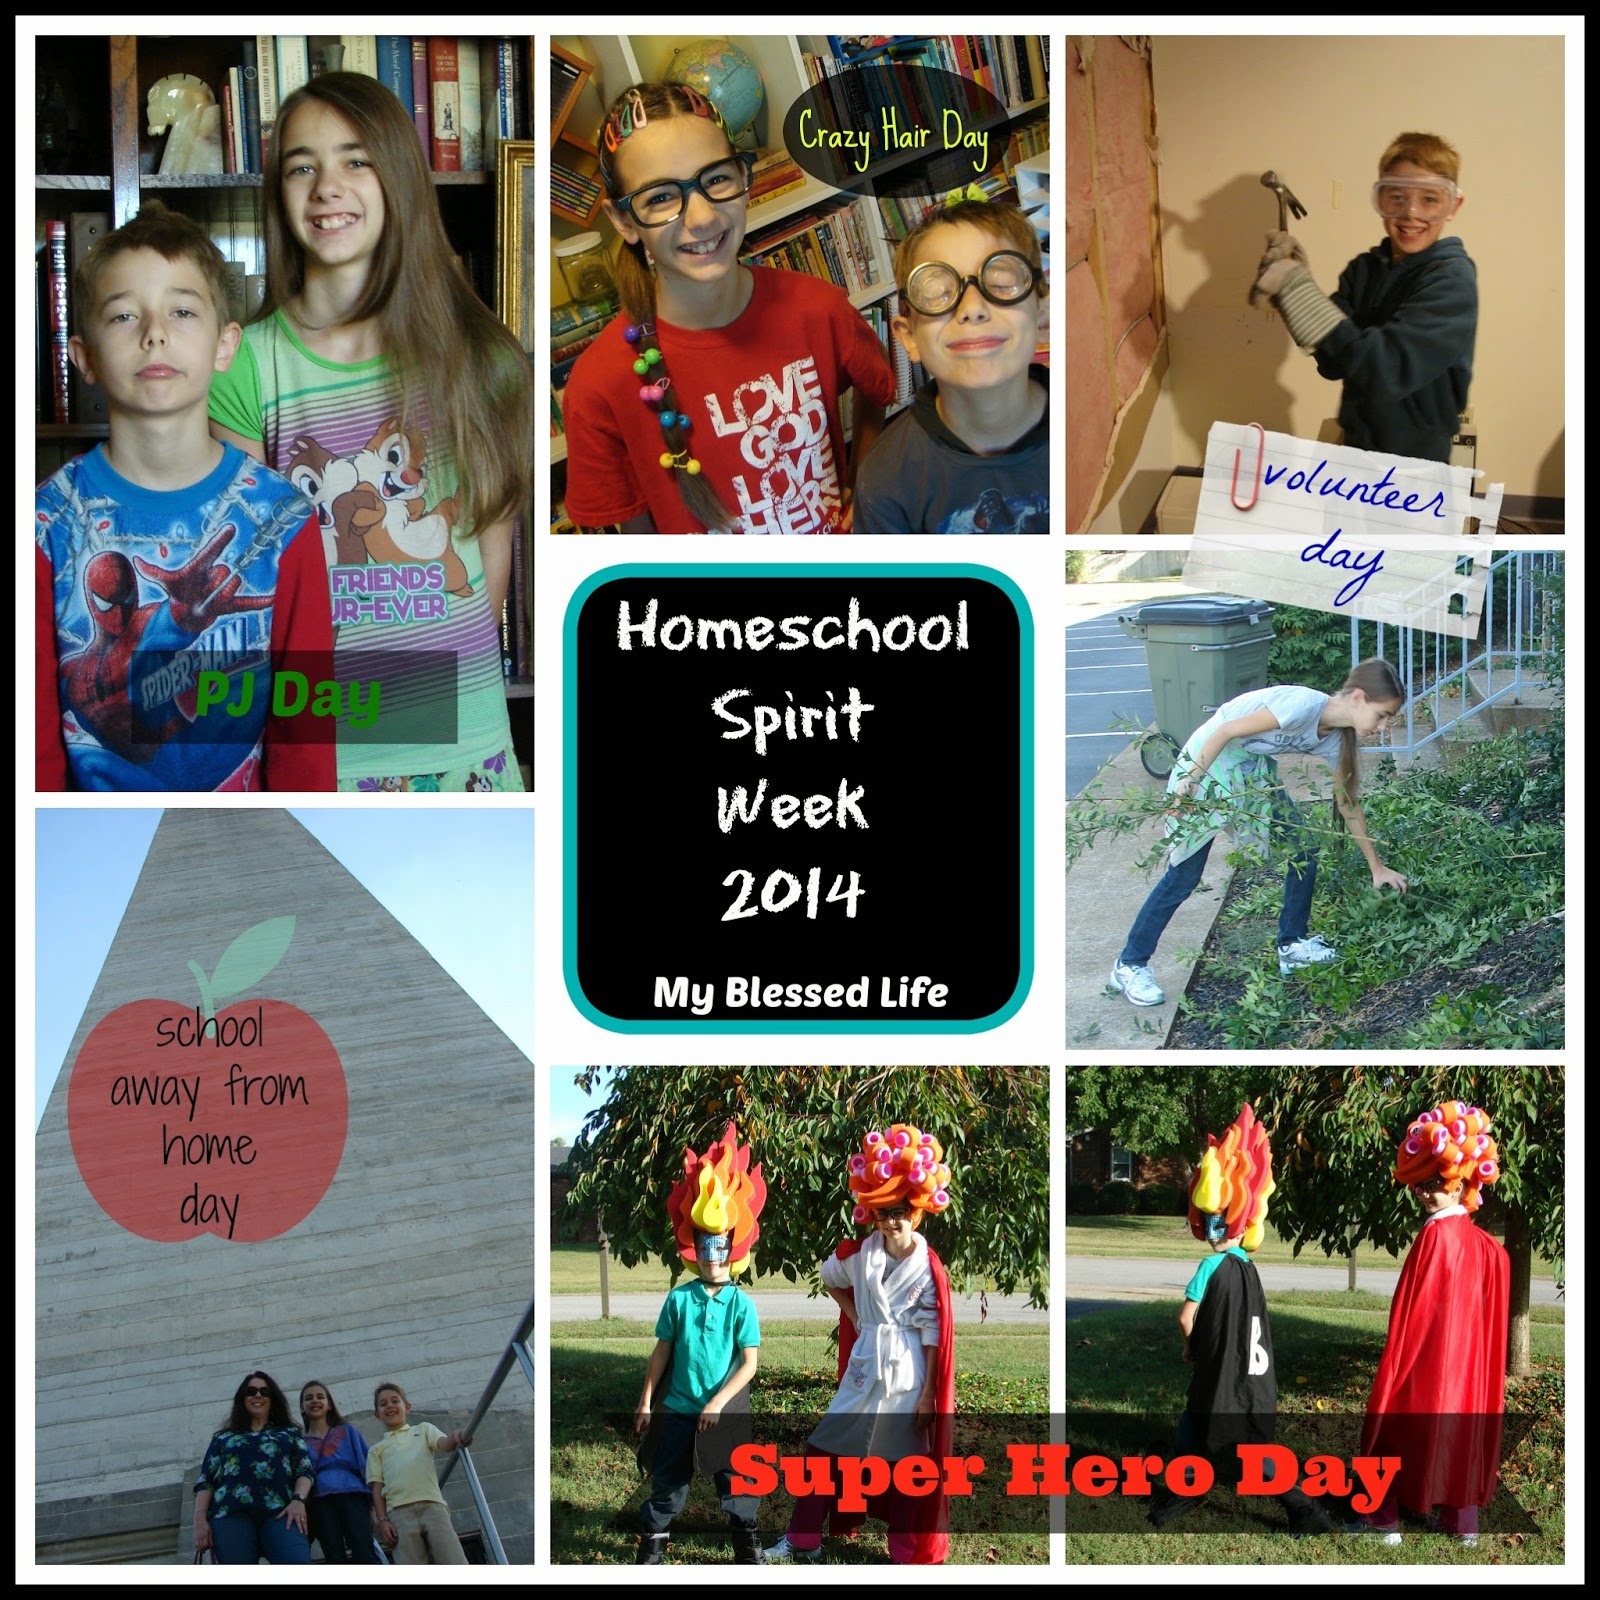


We celebrated with:
  • PJ Day on Monday
  • Crazy Hair Day on Tuesday
  • Volunteer Day on Wednesday (our kiddos worked at our church)
  • School Away From Home Day on Thursday (we visited the Jefferson Davis State Historic Site)
  • Super Hero Day on Friday (my kids were "Flame Boy" and "Super Cozy")
And just so you don't think it was all rainbows and butterflies this week, it got off to a pretty bumpy start on Monday with some terrible, horrible, awful bad attitudes.  So ...I loaded up the kids and made them run drills on a local soccer field.  

Things improved after that.  ;)

We also wrapped up our fall co-op session on Friday.  I have thoroughly enjoyed teaching 'Exploring Great Artists' this time around!  We've had a great time time learning about George Seurat, Jean Dubuffet, Jackson Pollock, and Alexander Calder (a personal new fave!).  I'm working on a post about the art projects we did--coming soon!  

I hope your week has been awesome as well!  


Popular posts from this blog

The Making of an Egyptian Death Mask

We are learning all about the ancient world this year with Story of the World I and loving it! We've been learning a lot about Egypt, of course, which is completely fascinating. Most recently we have studied the New Kingdom of Egypt, which includes the story of King Tut. So we decided making an Egyptian death mask in the style of King Tut's would be a fun project. First since it was too cold at the time to paper mache in the garage (it probably would have frozen instead of dried-ha) and it was too messy to do it in the house, we decided to pick up a couple of cheap craft masks at Hobby Lobby. Next we cut out cardboard shapes to complete the shape of the death mask, attaching them with hot glue. Vince even put a little detail on the *beard* with the hot glue per The Princess' request. Then the kiddos started to paint them with this metallic gold tempera paint. It worked okay for the cardboard, but would not coat the plastic of the mask. We thought maybe a second coat ...

Door Hanger Chore Charts

My kids have had a chore chart for a while.  It's one of those magnetic boards and they share it.  However, it's not by their rooms and often they (and I) forget to update it.  Plus it's a little bulky.   When I saw the concept of a door hanger chore chart on Pinterest, I loved it!  It was compact, right there were the kiddos could see it coming out and going into their rooms, and it costs almost nothing to make.   I headed over to one of my favorite stores: Hobby Lobby, of course.  They  have these little wooden door hangers for .79.  I also grabbed a couple of packets of decorative buttons for $1.99 each.  I already had the clothes pins and the paint so those cost me nothing.   I began by painting the door hangers (I used tempera paints because that's what I had).  Then I grabbed a fine point Sharpie and the clothes pins and started writing chores on them, making sure to write them correctly so they will ...

Making Notebooks

Recently I tried out a new craft idea~and it was SO much fun!! And extremely frugal, too. That's always a bonus, right? So here we go: 1. Take your basic composition notebook (purchased at the back-to-school sales for .99 each). 2. Go to your craft supplies and get your Mod Podge ready, along with a good paintbrush. 3. Look through all those scrapbook papers you've been randomly collecting and choose some. 3. After choosing your paper for the cover of your book and trimming it to fit, start *painting* the cover with the glue. Next, give the back of your paper a good coat of glue, too. (I left the binding uncovered so that I could use a contrasting paper there later on). 4. Glue it on! Remember to smooth out any air bubbles under the paper. 5. Flip the cover open and make a few cuts on the corners so that they will fold over nice and neat, then add a little more glue to the edges of the inside cover and a little more to the paper edges. 6. Fold them over and press...