Well, I finally got my files from last year cleaned out and sorted. I always dread that little task, but it's never really that bad once I buckle down and do it. And this year was easier than usual.
At last I have finally found a simpler way of keeping my files. In the past I kept files individually for all sorts of things: utilities, auto, health insurance, etc... The only problem with that system was that it was always growing. I always needed another file for something else because it didn't fit in any other file. I had way too many files.
But last year I found a system that worked so much better for me. I purchased a small expanding file~I think it has 13 pockets in it. That gives me one for each month of the year and one extra for miscellaneous stuff.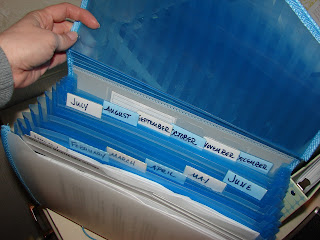
This way I simply file any paperwork for that month in that month's pocket. How easy is that? And the whole file is small enough to fit neatly on my desk.
 At the end of the year I just go through my little file and sort things into 3 piles: one for those things that I need to keep indefinitely, one for those things that need to be shredded and one for those things that can go directly into the recycling bin.
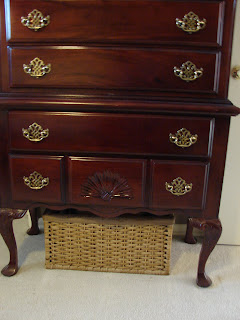
I still keep that larger file for the things I want to keep indefinitely. I have it all contained in a pretty basket that fits nicely under my highboy in my bedroom.
.JPG)
 How do you file your *important* papers? Do you have an easy system or do you feel like you're drowning in paperwork?
 This post is linked to Blissfully Domestic.
At last I have finally found a simpler way of keeping my files. In the past I kept files individually for all sorts of things: utilities, auto, health insurance, etc... The only problem with that system was that it was always growing. I always needed another file for something else because it didn't fit in any other file. I had way too many files.
But last year I found a system that worked so much better for me. I purchased a small expanding file~I think it has 13 pockets in it. That gives me one for each month of the year and one extra for miscellaneous stuff.
This way I simply file any paperwork for that month in that month's pocket. How easy is that? And the whole file is small enough to fit neatly on my desk.
At the end of the year I just go through my little file and sort things into 3 piles: one for those things that I need to keep indefinitely, one for those things that need to be shredded and one for those things that can go directly into the recycling bin.I still keep that larger file for the things I want to keep indefinitely. I have it all contained in a pretty basket that fits nicely under my highboy in my bedroom.
How do you file your *important* papers? Do you have an easy system or do you feel like you're drowning in paperwork? This post is linked to Blissfully Domestic.