I'm not sure how it happened, but Valentine's day seemed to last forever at our house this year:) So I'm just re-capping all of the fun here.
First, check out this heart-shaped potato, folks. Yes, a potato! I guess I was in the spirit of the holiday because I spotted this heart as soon as I picked it up. And, yes, I peeled it and we ate it. No *Shrine-of-the-Heart-Potato* here. I promise.
 Next up was the crafting of the Valentine boxes for our homeschool group's Valentine Skating Party. The kiddos were SO excited! The Princess went for a classic Valentine look, but Mr. B decided on a cowboy theme. Yes, he's into Toy Story right now:) And all of their hard work really paid off~their boxes were adorable.


 Vince and I exchanged Valentines with each other and the kiddos early since he would be out-of-town on Valentine's day. There was lots of chocolate involved.

 But Vince also got the kids the coolest gift...here they are checking it out.
 It's this: a cd collection of G.T. and the Halo Express. Basically it's Scripture put to music, so that it's easy to learn Bible verses. Apparently he had a set as a child and it made quite the impact since he can still remember a lot of the songs/verses to this day. After searching the internet, he finally found a set for them. They've really been enjoying them, especially at bedtime as they go to sleep. It's a great way to hide God's Word in your children's hearts.
 And look what Vince surprised me with: a beautiful turquoise necklace. I love it!
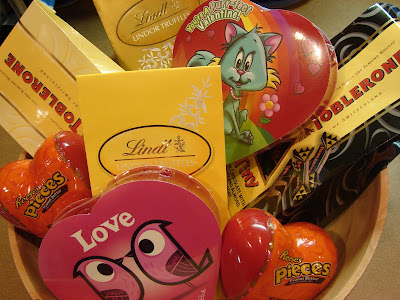
 Did I mention that chocolate was involved? I received an INSANE amount of chocolate. But that's okay. I plan to stash it and savor it for months to come:) And in case you're wondering, all of the chocolate in the pic below is ALL MINE! heehee
 Next came the celebration with Papi, Nana and Aunt Kari. We baked them a cookie cake, complete with eyelashes courtesy of The Princess. ALL eyes must have gorgeous, long lashes according to her.
 I'm pretty sure the cookie cake didn't last long. At least that's what I heard. I've not seen a crumb since:)

 Then there were more goodies for the kiddos: balloons, toys, colored pencils, coloring books, $$... I think my kids are spoiled. How did this happen?!

 Finally, the festivities wrapped up today (Monday) at our homeschool group's party. I baked my favorite chocolate cupcakes and gussied them up with some cute heart picks that I had stashed away. (Where do all these stashes come from?!?!).
 The Princess thoroughly enjoyed the Valentine exchange. She has looked at them about 100x now and they are displayed prominently all over her dresser:) So cute!
 And....drum roll please....Mr. B won the *Best in Show* in the preschool category for his box! I was so proud of him and you can tell his busting his buttons. The sad part was he has had some sort of virus for the past 24 hrs or so causing fever and nausea so he wasn't able to go to the party. But I took his box and his Valentines for him and winning the prize was a great consolation since he missed the rest of the fun.
 Oh~I know I said that wrapped things up. But Vince and I do have a hot date planned for when he gets back from his trip...and I'm very much looking forward to that! :)
First, check out this heart-shaped potato, folks. Yes, a potato! I guess I was in the spirit of the holiday because I spotted this heart as soon as I picked it up. And, yes, I peeled it and we ate it. No *Shrine-of-the-Heart-Potato* here. I promise.
 Next up was the crafting of the Valentine boxes for our homeschool group's Valentine Skating Party. The kiddos were SO excited! The Princess went for a classic Valentine look, but Mr. B decided on a cowboy theme. Yes, he's into Toy Story right now:) And all of their hard work really paid off~their boxes were adorable.

 Vince and I exchanged Valentines with each other and the kiddos early since he would be out-of-town on Valentine's day. There was lots of chocolate involved.
 But Vince also got the kids the coolest gift...here they are checking it out.
 It's this: a cd collection of G.T. and the Halo Express. Basically it's Scripture put to music, so that it's easy to learn Bible verses. Apparently he had a set as a child and it made quite the impact since he can still remember a lot of the songs/verses to this day. After searching the internet, he finally found a set for them. They've really been enjoying them, especially at bedtime as they go to sleep. It's a great way to hide God's Word in your children's hearts.
 And look what Vince surprised me with: a beautiful turquoise necklace. I love it!
 Did I mention that chocolate was involved? I received an INSANE amount of chocolate. But that's okay. I plan to stash it and savor it for months to come:) And in case you're wondering, all of the chocolate in the pic below is ALL MINE! heehee
 Next came the celebration with Papi, Nana and Aunt Kari. We baked them a cookie cake, complete with eyelashes courtesy of The Princess. ALL eyes must have gorgeous, long lashes according to her.
 I'm pretty sure the cookie cake didn't last long. At least that's what I heard. I've not seen a crumb since:)
 Then there were more goodies for the kiddos: balloons, toys, colored pencils, coloring books, $$... I think my kids are spoiled. How did this happen?!
 Finally, the festivities wrapped up today (Monday) at our homeschool group's party. I baked my favorite chocolate cupcakes and gussied them up with some cute heart picks that I had stashed away. (Where do all these stashes come from?!?!).
 The Princess thoroughly enjoyed the Valentine exchange. She has looked at them about 100x now and they are displayed prominently all over her dresser:) So cute!
 And....drum roll please....Mr. B won the *Best in Show* in the preschool category for his box! I was so proud of him and you can tell his busting his buttons. The sad part was he has had some sort of virus for the past 24 hrs or so causing fever and nausea so he wasn't able to go to the party. But I took his box and his Valentines for him and winning the prize was a great consolation since he missed the rest of the fun.
 Oh~I know I said that wrapped things up. But Vince and I do have a hot date planned for when he gets back from his trip...and I'm very much looking forward to that! :)