 After hauling the Dickens Village boxes out of the attic nearly two weeks ago, I was finally able to get it all set up on Sunday afternoon.
 I've noticed that a lot of people display their villages all on a flat, smooth surface and that is fine. But I thought I would share with you how I like to display mine. It's definitely not a flat, smooth surface~at least, not when I'm finished with it:)
First of all I clear my space off. In this case, I am displaying my village on the tops of my living room bookcases. So off to boxes go my framed pictures, etc.
 Next, I visualize which village pieces will go where and then I pillage my bookcases for the right-sized books. I stack them in varying heights across the tops of the bookcases, like so:
 Then I get out my *snow*. Now I'm not yet brave enough to use all those little packages of fake snow that come with the village pieces, so I use cotton batting. I used to find this in the fabric department, but last year I discovered that they are finally selling this type of *snow* in the Christmas departments. Yea! It's SO much easier! I simply cover my books with it, draping it across the tops of the bookcases.
 Then comes the fun (and tedious) part: setting up the village pieces. I usually anchor the center with a larger piece and also the ends, filling the in-between spaces with clusters of smaller pieces. After getting them all plugged in (thank you, Vince!), I add the accessories starting with the trees and finishing with the people. That's the really fun part!
 See what a difference it makes to have the pieces at varying heights? First of all, it's just incredibly more interesting to look at and, secondly, you can fit a lot more pieces on there! Since the pieces are different heights, you can stagger smaller pieces below and in front of larger pieces.
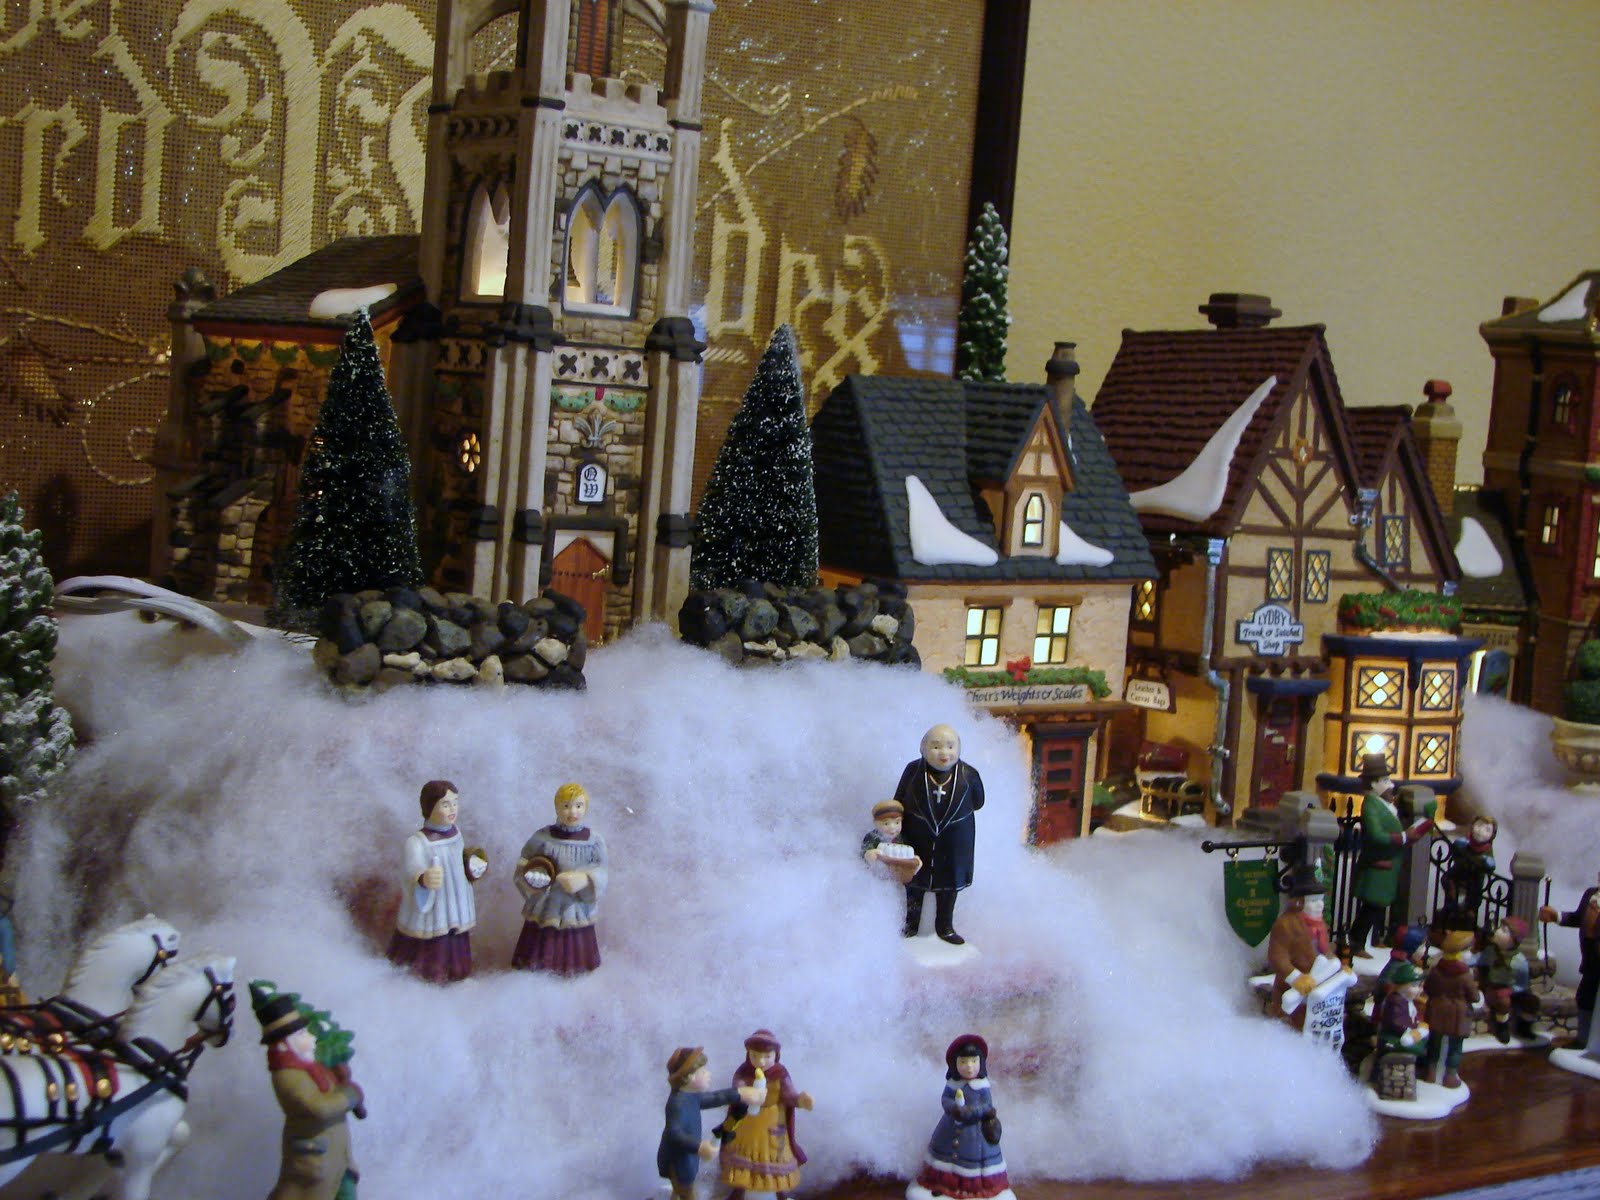 My Dickens Village is one of my favorite Christmas decorations! Some years I've set it up as early as October 1st, although I didn't this year. It makes more sense to do that though, since it's quite time-consuming to set up. But it's worth it! My kiddos are enamored with it!
 Do you have a village that you collect? How do you like to display it? There are so many ways and places, I'd love to hear your ideas.