
*Merry Christmas* From Our House

Welcome to our house at Christmastime! As it's a new house for us, I am still changing things and learning where I like things best. So it's been fun decorating for the holidays with a fresh perspective.

I was so happy to have a fireplace and mantel to decorate again! I realized this year that I haven't been able to use all of my mantel decor since 2005! So glad I saved all of that stuff because it was so fun to be able to pull it all out this year.


Here is our family room tree. For the second time ever I decided to put up two trees. Our little 7' tree is just so FULL of ornaments :) This year it holds all of the ornaments except my vintage glass ones and other blown glass ornaments. It's still VERY full, but I love it that way!


Rather than show you all of my nativities this year, I'm just highlighting a couple of them. This one is my favorite, made for me by a family friend.


This is another one I just love. I bought it in Mexico City. If you would like to see more of my nativity collection, you can take a peek here.

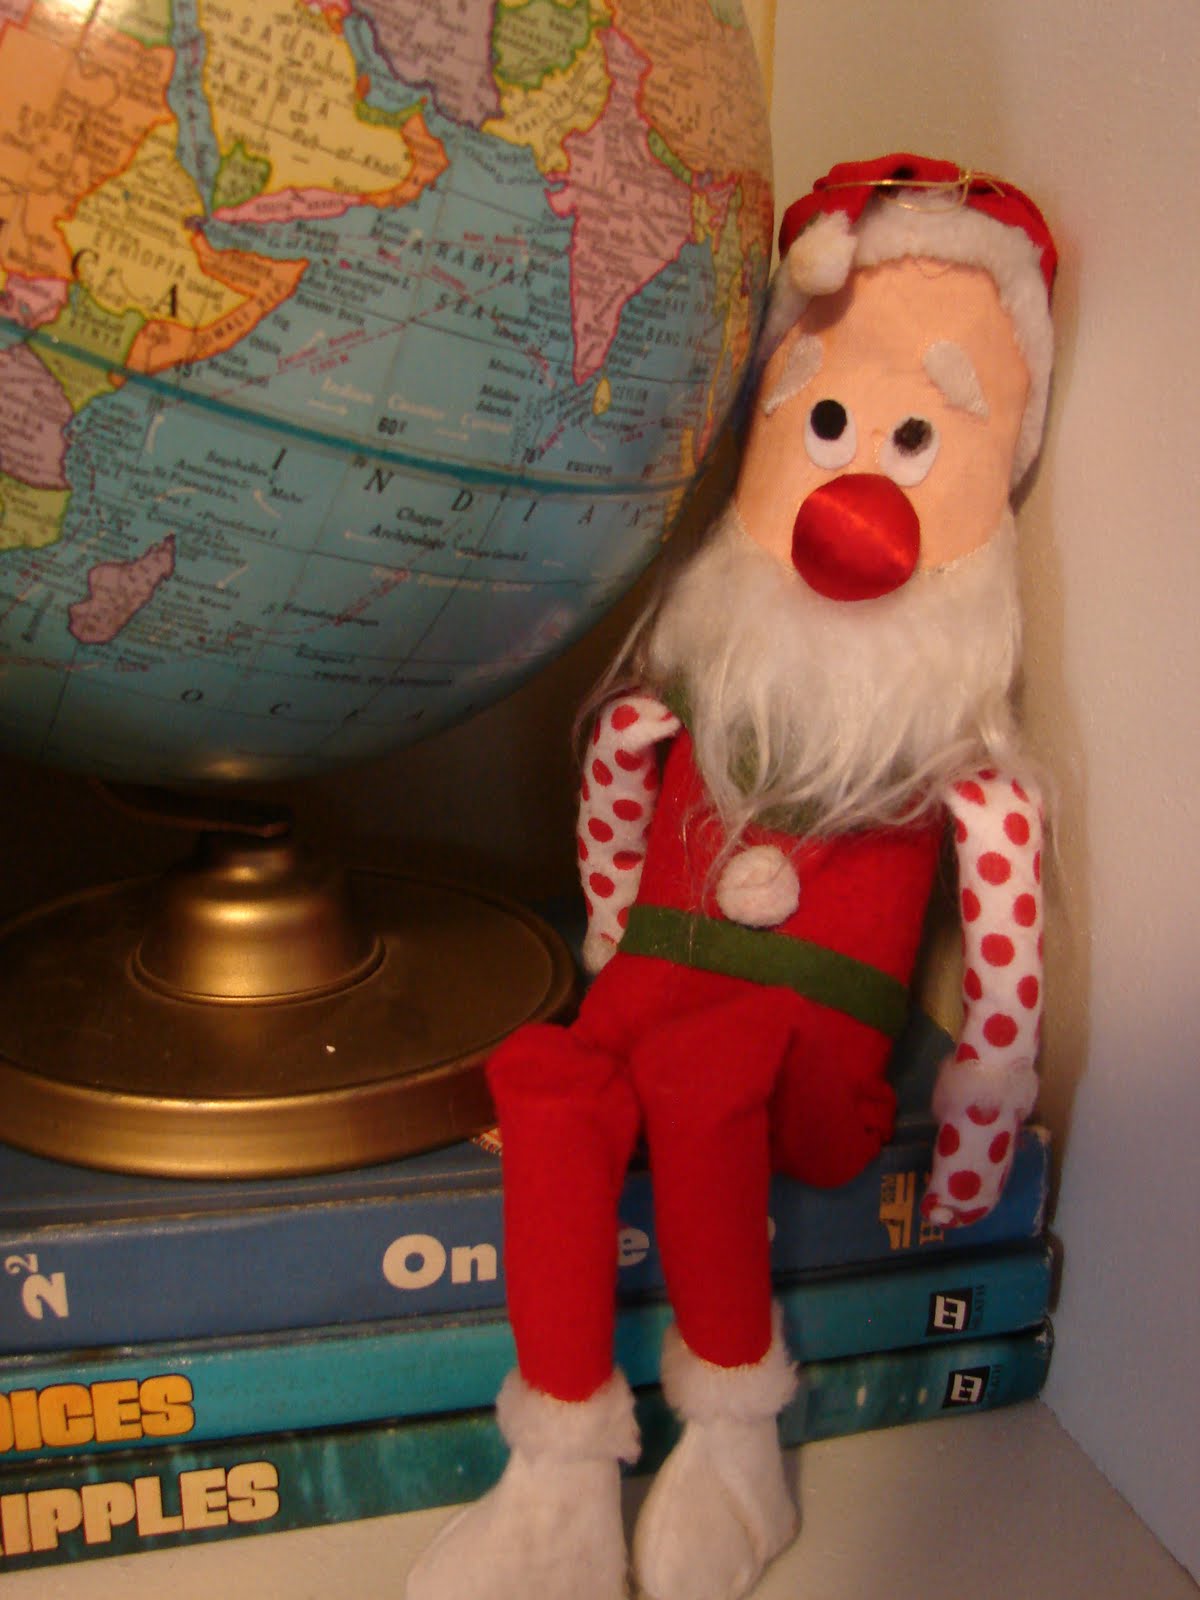
In our front room (technically known as the formal living room, but in our family it's the library/reading room) I created this sweet grouping of some of my favorite things: pretty Christmas boxes, my Christmas journals/scrapbooks and my vintage Santa.


The front room window is draped in garland and bubble lights (I adore bubble lights!).


This is also where the second tree is. I thought I would show you a few of my favorite ornaments from this tree.

My Dickens' Village is also in the library room, on top of the bookcases. It's a lot of work to put up, but I love to hear my kiddos *oohh and aahhh* over it:)


Of course, one of my favorite things about the holidays is what the mailman brings: Christmas cards! I love displaying them on my card wreath.


And now for some of the holiday touches in the kitchen/dining area. Here is my only pair of Byers Choice carolers. I thought they looked sweet on my china cabinet.


My *Frosty* cookie jar is on another hutch alongside my fruit and veggie tree.


The nutcrackers are standing guard over my cookbooks this year.


Even the hall bath gets some touches of Christmas.


I tucked my tiniest nativity set on a shelf in here.


I always put my little *vintage* tree and *vintage* village in the master bedroom. I love the soft colors of it all.


I hung my glittery *peace* banner over our headboard of antique doors. I added a little extra touch to the doorknob on my side of the bed:)


Here's a closeup of Mr. B's tree (the kiddos each have a small one in their rooms).


And here's The Princess' tree...along with her cute Junie B. Jones wall calendar.


We didn't forget the learning room either! There are a couple more nativities...

...my childhood elf...

...and our Jesse tree.


And now we continue counting down the days 'till Christmas!

May you have a wonderful and blessed Christmas!

Check out more beautiful Christmas decorations at


Popular posts from this blog

The Making of an Egyptian Death Mask

We are learning all about the ancient world this year with Story of the World I and loving it! We've been learning a lot about Egypt, of course, which is completely fascinating. Most recently we have studied the New Kingdom of Egypt, which includes the story of King Tut. So we decided making an Egyptian death mask in the style of King Tut's would be a fun project. First since it was too cold at the time to paper mache in the garage (it probably would have frozen instead of dried-ha) and it was too messy to do it in the house, we decided to pick up a couple of cheap craft masks at Hobby Lobby. Next we cut out cardboard shapes to complete the shape of the death mask, attaching them with hot glue. Vince even put a little detail on the *beard* with the hot glue per The Princess' request. Then the kiddos started to paint them with this metallic gold tempera paint. It worked okay for the cardboard, but would not coat the plastic of the mask. We thought maybe a second coat ...

Door Hanger Chore Charts

My kids have had a chore chart for a while.  It's one of those magnetic boards and they share it.  However, it's not by their rooms and often they (and I) forget to update it.  Plus it's a little bulky.   When I saw the concept of a door hanger chore chart on Pinterest, I loved it!  It was compact, right there were the kiddos could see it coming out and going into their rooms, and it costs almost nothing to make.   I headed over to one of my favorite stores: Hobby Lobby, of course.  They  have these little wooden door hangers for .79.  I also grabbed a couple of packets of decorative buttons for $1.99 each.  I already had the clothes pins and the paint so those cost me nothing.   I began by painting the door hangers (I used tempera paints because that's what I had).  Then I grabbed a fine point Sharpie and the clothes pins and started writing chores on them, making sure to write them correctly so they will ...

Fun With 4th of July Crafts: Part 3

I love my new patriotic front door wreath!! I had fun putting this together, although I must admit this is more of an adult craft than one for kiddos. I was inspired by this article in Family Fun magazine. I didn't have quite everything I needed for this one, but all I had to purchase was a few sheets of scrapbook paper and some double-sided tape. Then all I had to gather up were some scissors, regular Scotch tape, a ruler and some cardboard. First I cut four (5"x 6") pieces of each paper. Then by placing a piece of double-sided tape on one of the short ends of the papers, I rolled them into cones, pressing the seams together well. Then I cut a 10" circle out of cardboard and began to stick the cones on it. I used another piece of double-sided tape to stick the cones on, arranging them in a circular pattern. Next I used regular Scotch tape to attach them on the back to the back of the cardboard. After getting all the cones on, I was ready for my centerpiece. He...