
Our Annual Pumpkin Carving Night

Some years we host a party with friends and some years we simply have a family night, but we always have a pumpkin carving night at the end of October. Its just one of our traditions. This year it was a family night that included my parents and sister.

We almost always have the same menu each year, too, but whatever the menu is it always includes white chili. Tonight's menu was:

Bread Pot Fondue
with Spicy Saltines Roasted Pumpkin Seeds White Chili Cornbreadand
Butter Cookies

Boy, was it yummy! I'll have to share that Bread Pot Fondue with Spicy Saltines with you soon. And maybe the Butter Cookies, too. Those are one of my all-time fave cookies.


After the food, we got down to business with the carving.

The Princess with Aunt KariMr. B and Vince

Nana and Papi chilled out with *It's the Great Pumpkin, Charlie Brown*. Bless their hearts, they just got home today from an almost-24-hour trip back home from Alaska. They were a little tired, to say the least.

And without further ado, here are our family pumpkins for 2009:


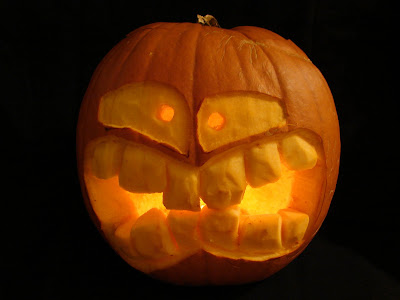
Vince's *Toothy Guy*:
My *Mickey Mouse*:

The Princess' *Pumpkin Snowman Stack*:
Mr. B's *Fib*(as in Larry-Boy and the Fib From Outer Space:)
How about you and your family? Do you enjoy carving pumpkins? Leave me a comment!

This post is linked to Show and Tell at My Romantic Home.

Popular posts from this blog

The Making of an Egyptian Death Mask

We are learning all about the ancient world this year with Story of the World I and loving it! We've been learning a lot about Egypt, of course, which is completely fascinating. Most recently we have studied the New Kingdom of Egypt, which includes the story of King Tut. So we decided making an Egyptian death mask in the style of King Tut's would be a fun project. First since it was too cold at the time to paper mache in the garage (it probably would have frozen instead of dried-ha) and it was too messy to do it in the house, we decided to pick up a couple of cheap craft masks at Hobby Lobby. Next we cut out cardboard shapes to complete the shape of the death mask, attaching them with hot glue. Vince even put a little detail on the *beard* with the hot glue per The Princess' request. Then the kiddos started to paint them with this metallic gold tempera paint. It worked okay for the cardboard, but would not coat the plastic of the mask. We thought maybe a second coat ...

Door Hanger Chore Charts

My kids have had a chore chart for a while.  It's one of those magnetic boards and they share it.  However, it's not by their rooms and often they (and I) forget to update it.  Plus it's a little bulky.   When I saw the concept of a door hanger chore chart on Pinterest, I loved it!  It was compact, right there were the kiddos could see it coming out and going into their rooms, and it costs almost nothing to make.   I headed over to one of my favorite stores: Hobby Lobby, of course.  They  have these little wooden door hangers for .79.  I also grabbed a couple of packets of decorative buttons for $1.99 each.  I already had the clothes pins and the paint so those cost me nothing.   I began by painting the door hangers (I used tempera paints because that's what I had).  Then I grabbed a fine point Sharpie and the clothes pins and started writing chores on them, making sure to write them correctly so they will ...

Fun With 4th of July Crafts: Part 3

I love my new patriotic front door wreath!! I had fun putting this together, although I must admit this is more of an adult craft than one for kiddos. I was inspired by this article in Family Fun magazine. I didn't have quite everything I needed for this one, but all I had to purchase was a few sheets of scrapbook paper and some double-sided tape. Then all I had to gather up were some scissors, regular Scotch tape, a ruler and some cardboard. First I cut four (5"x 6") pieces of each paper. Then by placing a piece of double-sided tape on one of the short ends of the papers, I rolled them into cones, pressing the seams together well. Then I cut a 10" circle out of cardboard and began to stick the cones on it. I used another piece of double-sided tape to stick the cones on, arranging them in a circular pattern. Next I used regular Scotch tape to attach them on the back to the back of the cardboard. After getting all the cones on, I was ready for my centerpiece. He...