
The Princess Turns 9!

 Can't believe my sweet girl turned 9 today!  I am so proud of the amazing young lady she is growing into!
We had a lot of fun celebrating with her today.  Here are some of the moments that I captured:

She wanted breakfast in bed...even though she was already up & dressed:)

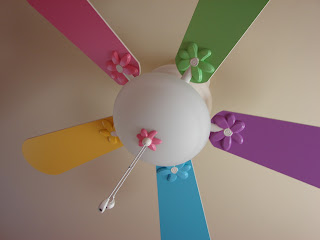
She woke up to find a ceiling fan in her room--the exact one she's been wanting from Lowe's!

We spent the morning on a very cool field trip to Ebonite International
learning how bowling balls are made.

She chose to have her special birthday lunch with Nana & Papi at Logan's
(she loves those peanuts!).

I love this {rare} loving moment between brother and sister
(he was almost as excited about her birthday as she was!).

Her birthday "loot";)

She requested finger sandwiches for her birthday party with her girlfriends
so we had chicken salad and cucumber.

She also requested these pink meringues.

This was her birthday cake request: yellow cake with chocolate frosting with
strawberries on top...mmmmmm

Of course, we had to have more strawberries with chocolate dip!

My girl is a veggie eater!  

I made yummy Almond Tea, too.

Here she is with her friends just before digging into the good eats.

And here they all are having a little photo session fun:)

Happy 9th Birthday to The Princess!

Popular posts from this blog

The Making of an Egyptian Death Mask

We are learning all about the ancient world this year with Story of the World I and loving it! We've been learning a lot about Egypt, of course, which is completely fascinating. Most recently we have studied the New Kingdom of Egypt, which includes the story of King Tut. So we decided making an Egyptian death mask in the style of King Tut's would be a fun project. First since it was too cold at the time to paper mache in the garage (it probably would have frozen instead of dried-ha) and it was too messy to do it in the house, we decided to pick up a couple of cheap craft masks at Hobby Lobby. Next we cut out cardboard shapes to complete the shape of the death mask, attaching them with hot glue. Vince even put a little detail on the *beard* with the hot glue per The Princess' request. Then the kiddos started to paint them with this metallic gold tempera paint. It worked okay for the cardboard, but would not coat the plastic of the mask. We thought maybe a second coat ...

Door Hanger Chore Charts

My kids have had a chore chart for a while.  It's one of those magnetic boards and they share it.  However, it's not by their rooms and often they (and I) forget to update it.  Plus it's a little bulky.   When I saw the concept of a door hanger chore chart on Pinterest, I loved it!  It was compact, right there were the kiddos could see it coming out and going into their rooms, and it costs almost nothing to make.   I headed over to one of my favorite stores: Hobby Lobby, of course.  They  have these little wooden door hangers for .79.  I also grabbed a couple of packets of decorative buttons for $1.99 each.  I already had the clothes pins and the paint so those cost me nothing.   I began by painting the door hangers (I used tempera paints because that's what I had).  Then I grabbed a fine point Sharpie and the clothes pins and started writing chores on them, making sure to write them correctly so they will ...

Fun With 4th of July Crafts: Part 3

I love my new patriotic front door wreath!! I had fun putting this together, although I must admit this is more of an adult craft than one for kiddos. I was inspired by this article in Family Fun magazine. I didn't have quite everything I needed for this one, but all I had to purchase was a few sheets of scrapbook paper and some double-sided tape. Then all I had to gather up were some scissors, regular Scotch tape, a ruler and some cardboard. First I cut four (5"x 6") pieces of each paper. Then by placing a piece of double-sided tape on one of the short ends of the papers, I rolled them into cones, pressing the seams together well. Then I cut a 10" circle out of cardboard and began to stick the cones on it. I used another piece of double-sided tape to stick the cones on, arranging them in a circular pattern. Next I used regular Scotch tape to attach them on the back to the back of the cardboard. After getting all the cones on, I was ready for my centerpiece. He...