
The First Month of Homeschool

Its hard to believe that we just wrapped up the first 4 weeks of school for this year. It has absolutely flown by! And it has gone really well. That doesn't mean that every day is perfect, but we are having a great time learning together.

I'm also really happy with our new homeschool group that we've joined. Last year was a pretty lonely time for me with pretty much no support group at all, so when we moved I was determined to find a good homeschool group to become a part of. We now are participating in co-op classes each Friday afternoon and the kiddos are loving it. The Princess has art, a book club and a history class and Mr. B is taking early math and early reading classes with playtime in between.

Our group took a field trip to a local fire station this past week, too, and we all had so much fun!

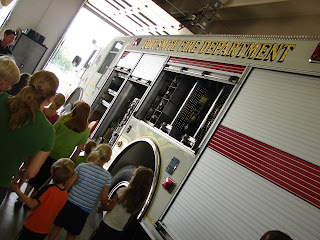
Fort Smith Fire Station No. 1

Demonstrating *the suit*

coming out of *The Smoke House*

The Princess was so excited to blow the horn on the fire engine.

We also took a trip this month for some of my husband's speaking engagements and were able to take the kiddos on some other fun field trips (have I told you how much I love field trips?!) : the Colonel Sander's original cafe, Cumberland Falls and Mammoth Cave.

So, yes, September has been a busy month~and its not over yet. I've got a trip to our state fair and a regional apple festival on the calendar before everything is said and done:)

Popular posts from this blog

The Making of an Egyptian Death Mask

We are learning all about the ancient world this year with Story of the World I and loving it! We've been learning a lot about Egypt, of course, which is completely fascinating. Most recently we have studied the New Kingdom of Egypt, which includes the story of King Tut. So we decided making an Egyptian death mask in the style of King Tut's would be a fun project. First since it was too cold at the time to paper mache in the garage (it probably would have frozen instead of dried-ha) and it was too messy to do it in the house, we decided to pick up a couple of cheap craft masks at Hobby Lobby. Next we cut out cardboard shapes to complete the shape of the death mask, attaching them with hot glue. Vince even put a little detail on the *beard* with the hot glue per The Princess' request. Then the kiddos started to paint them with this metallic gold tempera paint. It worked okay for the cardboard, but would not coat the plastic of the mask. We thought maybe a second coat ...

Door Hanger Chore Charts

My kids have had a chore chart for a while.  It's one of those magnetic boards and they share it.  However, it's not by their rooms and often they (and I) forget to update it.  Plus it's a little bulky.   When I saw the concept of a door hanger chore chart on Pinterest, I loved it!  It was compact, right there were the kiddos could see it coming out and going into their rooms, and it costs almost nothing to make.   I headed over to one of my favorite stores: Hobby Lobby, of course.  They  have these little wooden door hangers for .79.  I also grabbed a couple of packets of decorative buttons for $1.99 each.  I already had the clothes pins and the paint so those cost me nothing.   I began by painting the door hangers (I used tempera paints because that's what I had).  Then I grabbed a fine point Sharpie and the clothes pins and started writing chores on them, making sure to write them correctly so they will ...

Fun With 4th of July Crafts: Part 3

I love my new patriotic front door wreath!! I had fun putting this together, although I must admit this is more of an adult craft than one for kiddos. I was inspired by this article in Family Fun magazine. I didn't have quite everything I needed for this one, but all I had to purchase was a few sheets of scrapbook paper and some double-sided tape. Then all I had to gather up were some scissors, regular Scotch tape, a ruler and some cardboard. First I cut four (5"x 6") pieces of each paper. Then by placing a piece of double-sided tape on one of the short ends of the papers, I rolled them into cones, pressing the seams together well. Then I cut a 10" circle out of cardboard and began to stick the cones on it. I used another piece of double-sided tape to stick the cones on, arranging them in a circular pattern. Next I used regular Scotch tape to attach them on the back to the back of the cardboard. After getting all the cones on, I was ready for my centerpiece. He...